
You are on Facebook right? I mean your business has a Facebook Page doesn’t it? And more importantly you know how to verify a Facebook Page don’t you?
Despite declining reach, and the increasing need to “pay to play” on Facebook it is still the mainstay of social media platforms for most local businesses. As of 1st February Facebook stated they had over 1.2 billion daily active users globally. And if you’re only thinking locally then you should know that around 17 million Australians use Facebook each month, which is more than the combined usage of Instagram, Snapchat, Tumblr and LinkedIn combined.
But, Facebook is a really busy place and it’s really hard to be seen or heard over the noise! Yes, that’s true. Marketing your business on Facebook is a little like standing in a sea of hawkers at Queen Victoria Market. You either need to yell the loudest, or you need to do something else to stand out.
Having a verified Facebook page is one way of appearing more ‘legitimate’ on Facebook and helps you stand out. In fact in Facebook’s own words “Verified Pages show up higher in search results”.

On top of that we (users) are conditioned to look for subtle trust signals when dealing with businesses online. Having a verified Page is a good way of adding a measure of trust and legitimacy to your Facebook business profile.
What is a Verified Facebook Page
In simple terms, a Verified Facebook Page is one that Facebook has authenticated as a real business. It’s really simple to create a Facebook Page, and anyone can create a Page under almost any name. Because of this there are lots of illegitimate Facebook Pages out there.
There are two types of Verified Facebook Pages in the Facebook ecosystem:
- Blue verification check marks signify the authenticity of public figures, media companies, or global brands.
- Grey verification check marks signify the authenticity of specific locations for business or organisations.e
The verification process for a local business is as simple as receiving a PIN number by telephone (to your business landline) or by submitting scanned copies of paperwork that verifies that you are related to the business.
Benefits of verifying your Facebook Business Page
It’s really hard to measure the exact impact of adding a grey verification badge to your business page, but here are a couple of benefits that you might start noticing straight away:
- The verification badge add a layer of credibility or legitimacy to your business page.
- Your followers will know that any updates they see here are coming from your official channel, rather than a fan account, bogus page or some other unofficial source.
- If users want to talk directly to your business and leave any feedback (complaints, returns, suggestions or other customer service needs) they’ll trust they are in the right place.
- Your Facebook business page will rank higher in Facebook search results.
How to Verify a Facebook Page
- Go to your Facebook Page.
- On desktop click on Settings (top right) or on mobile tap the three dots (…) next to Search then tap Edit Settings.
- Click the General tab then find Page Verification, and click Verify your Page.
- Now enter your business phone number or check that Facebook has the correct number on file and tap Call Me Now.
- Wait for a phone call from Facebook (it’s a recorded message, not a real person) and be sure to write down the 4-digit verification code.
- Enter the verification code in Facebook and click Continue.
- All going well you should see a message saying your Business Page has been verified.
- If you go to your Facebook Business Page now you’ll find a grey verification check mark next to your business name to indicate your page is verified.
- Done! It’s as simple as that.
Verification Checks
Below is a search in Facebook for “wineries”, with some of the wineries having already Verified the Business Page.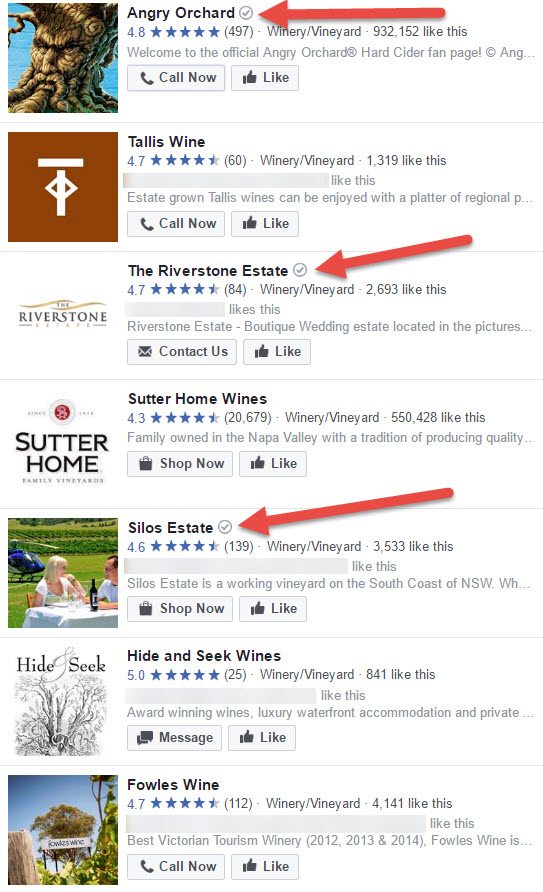
Recommended Tools
- Facebook Pages Manager available on iOS and Android – Not only does this provide a streamlined approach to managing your Facebook Page via your mobile device, but it’s also a great way of not getting distracted by your personal news feed (you ONLY see your business page notifications).
Recommended Reading
- Three ways a local business can use Facebook graph search
, a video on leveraging the power of Facebook’s own search algorithm.
- How to change your Facebook custom/vanity URL
- An introduction to Facebook’s message response rate feature
.


